Imagine driving some time past midnight down a narrow, single-lane road with dense forestry both to your left and right. Out of nowhere, you see a deer run out directly in front of your car. At this point, you will most likely have a near-heart attack as you slam on the breaks or sharply veer to the left or right of the deer. In most cases, cloudy or hazed headlight covers is the culprit. So, how do you restore headlight covers?
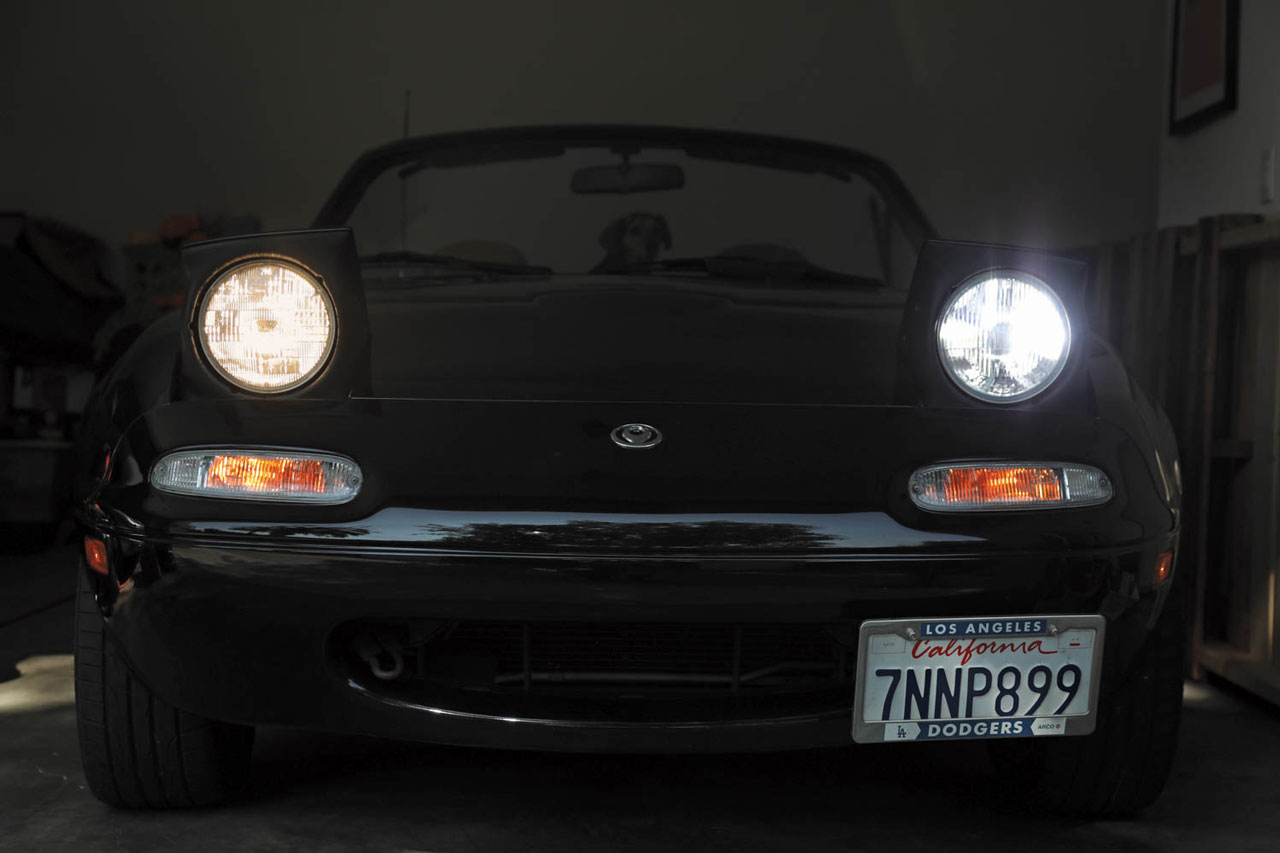
Many safety experts in the automotive industry claim that having clean, fully-operational headlights would provide enough illumination to help you completely avoid potential accidents such as the one mentioned above, and this claim is true.
With greater illumination, you will be able to see more, both clearer and sooner even on the darkest of roads which is guaranteed to help minimize the number of accidents on poorly lit roads.
Below, we go over several tried-and-tested methods you can use for cleaning and/or restoring headlights. Also, we will discuss in detail what causes them to fog up in the first place, why it is important to clean them, and present how you can protect your newly-cleaned headlights against contaminants, UV rays, and more to help avoid this problem from happening in the future.
What Causes Headlight Fogging?
At some point in the 1980s, vehicle manufacturers using plastic and polycarbonate for the material of car headlights, or the headlight lens rather than glass. The trade-offs are that a plastic headlight cover is less likely than glass to shatter, but is more likely to become a foggy headlight.
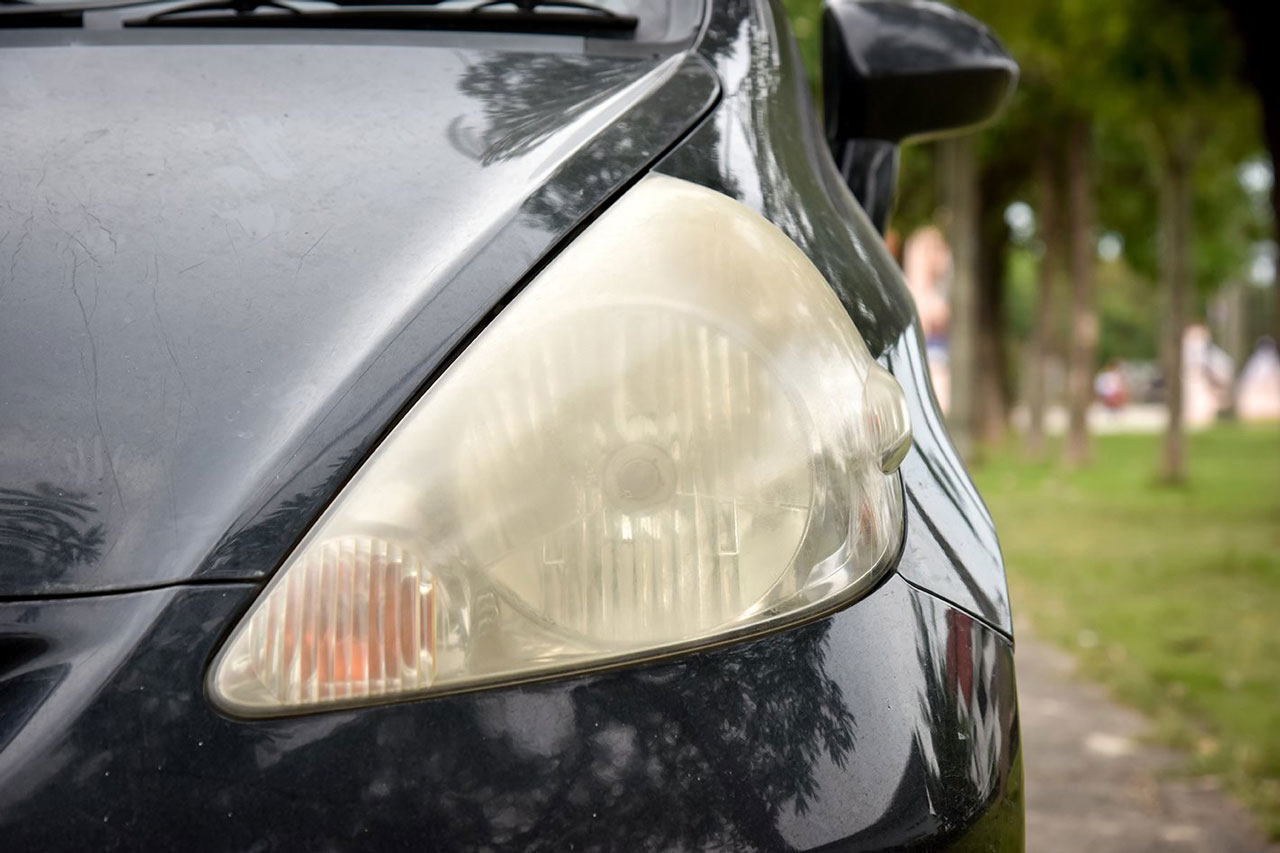
Headlights nowadays tend to get cloudy more often than in previous years for several reasons. The main cause, however, is oxidation. Oxidation was discussed in our article on paint fading, and the same ideas apply to the lamp covers of your car’s headlights. The main contributor to oxidation of headlight covers is UV exposure. However, constant bombardment from road grime, bug splatter, and other debris can accelerate damage.
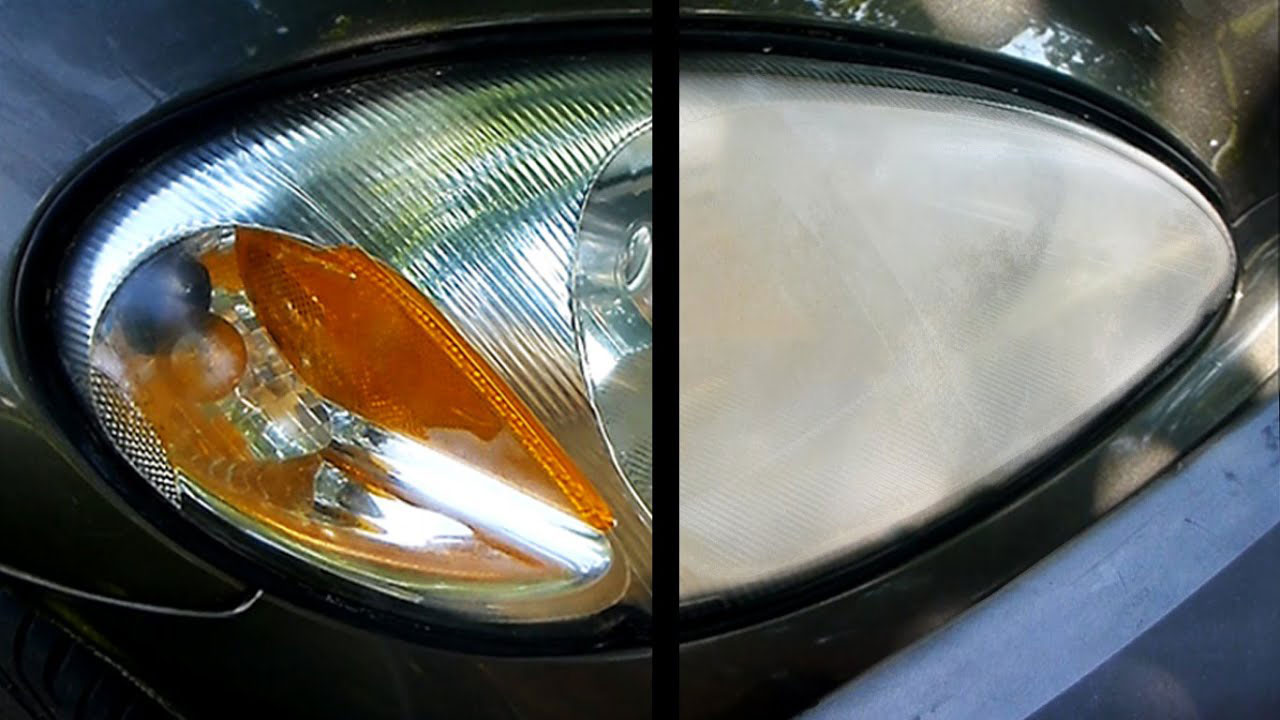
So, what else causes fogging on plastic or polycarbonate headlights? UV light, grime/debris from the road, salt, and different kinds of contaminants all potentially increase the risk of oxidation and thus cloudiness. As the clarity being emitted from your headlights starts fading, your visibility during night driving decreases with it.
That said, we will now go over some of the best DIY methods you can use to clean your headlights and prevent them from being foggy.
Cleaning Headlights using Toothpaste/Baking Soda
First on our list of potential headlight cleaning methods is the classic toothpaste approach. Toothpaste consists of slightly abrasive chemicals, which can help break down contaminants on your headlights, similarly to how it breaks down plaque and tartar on teeth. In addition, however, toothpaste also has properties that aid in stain-removal.
The process of using toothpaste to clean your headlights is as follows:
Gather Supplies
Here are the supplies you will need to clean your headlights with baking soda or toothpaste:
- Protective gloves
- Bucket of water
- Paint or masking tape
- A microfiber cloth and a few other clean cloths
- Toothpaste (preferably non-flavored, regular – not gel), or baking soda
- Avoid using dish soap
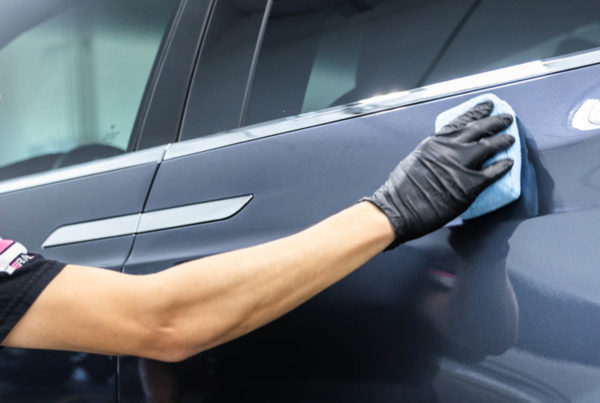
Clean with Soap: After gathering your supplies, it’s time to begin the cleaning process. Start by scrubbing the entire headlight area with soap or shampoo made specifically for automotive vehicles using a washcloth or wash mitt, then rinse the area with water. Make sure to dry off all the water with a microfiber towel before proceeding.
Apply Tape: After cleaning and drying the area, grab your paint or masking tape and tape it around the frame of the headlights. This is to protect the frame against potential damage from the toothpaste or baking soda in case it is newly painted or coated with chrome plastic.
Start the Restoration: Next, grab a slightly wet microfiber cloth, add a small bit of toothpaste to the cloth, and then rub the headlights, pressing down firmly while moving the cloth slowly in small circles. Repeat this process, adding more water and toothpaste onto the cloth when needed, for about 5 minutes for each headlight.
Rinse and Dry: Next, splash some water onto the area to rinse off any remaining debris and make sure to completely dry both headlights with a microfiber towel. Once dry, take a good look at each headlight again and repeat this entire process if needed.
Cleaning Headlights using Glass Cleaner/Automotive Polish
Another common method used to restore clarity in a car’s headlights is a combination of glass cleaner with automotive polish, where the glass cleaner works as the primary cleaner in loosening debris and the automotive or cutting polish is applied after the fact to remove any haze created by the glass cleaner.
Gather Supplies
Here are the supplies you will need to clean your headlights with automotive glass cleaner and polish:
- Automotive glass cleaner (opt for one that does not contain ammonia)
- Paint or masking tape
- Cutting polish or automotive rubbing compound
- Protective gloves
- Rotary or electric buffer
- Clean microfiber cloths and towel
- Bucket of water
Prep the Surface: To avoid damaging the surface of your vehicle with glass cleaner, start by taping off the area where your headlights are with paint or masking tape.
Apply Glass Cleaner to the Headlights: Most glass cleaners come in spray bottles, so at this point go ahead and spray your yellowed headlights with a good amount of product. Give it a few seconds to sit and soak, then wipe it off with a microfiber cloth. Be sure to not use this same cloth again on the same headlight; you can re-use it once again on the other headlight though.
Apply Polish: Use automotive or cutting polish to buff the surface of the headlight.
Rinse and Dry: Take your bucket of water and pour some water onto the surface to remove any remaining debris or excess polish and then dry it off with a clean microfiber towel. Repeat this process if needed; however, keep in mind that in some cases there might be damage that is not cleanable and will require replacement.
Cleaning Headlights using Sandpaper/Polish
We decided to save the best for last; sandpaper and polish is generally considered the most effective approach to restoring headlights using a DIY approach. With this method, you first use sandpaper with grit ranging between 600 and 3,000 to remove most of the foggy haze using a technique known as color sanding. Then, you finish by applying polish.
In fact, this method is so effective that many stores sell a headlight restoration kit which include the necessary materials to produce a clean headlight. Whether you use a store-bought kit or your own materials, you’ll want to use a technique known as progressive sanding to reduce oxidized headlights.
Here are all the steps involved in cleaning headlights with sandpaper and polish:
Gather Supplies
The first step, as always, is to gather the necessary supplies. In this case, you can simply purchase a DIY kit which will come with everything you need except for a spray bottle, microfiber cloths, and masking tape, or you can get these three items along with sandpaper with grit grades ranging from 600 to 3000 as well as a cutting or polishing compound.
Prep the surface: As before, apply painters tape to outline of your headlights so you know exactly where and where not to do any sanding or polishing.
Wash and Rinse: Mix automotive soap into a wash bucket with water and use a washcloth or mitt to thoroughly scrub the area clean. If you are using a store-bought kit, use the soap that comes with it if it came with any.
Wet Sand: Next is where you want to begin wet sanding the headlights. While we can describe the process, watching the related video would be the most beneficial for you. Also, make sure you figure out exactly which grade of sandpaper you should be using based on how foggy the headlights are. If you purchased a kit, you will most likely use sanding discs instead.
The trick is to gradually increase the grade number of the grit of the sandpaper you are using. One strategy that works well is to switch off between a side to side pattern and an up and down pattern for each grade of sandpaper grit applied to help reduce the number of scratches.
Add Polish: After the sanding process is complete, the final step is applying a polish compound to the headlights, which will help cover up any minor scratches that might have been caused by the sanding process. Take your time with this step, ensuring that the cutting compound and polish soak thoroughly into any surface imperfections to work their magic.
How to Protect Restored Headlight Covers
If you’ve read the different steps listed above and think – “there must be a better way to do this” – there is. It’s working with a professional auto salon to have them professionally restore your headlights and protect them with a professional-grade nano ceramic coating.
Ceramic Pro 9H is a professionally-installed 9H nano ceramic coating. It is made for specific materials or substrates, such as clear coat on vehicle’s paint job, glass, wheels, vinyl wraps, paint protection film, and even headlight covers and other plastic materials. We also have a line of Ceramic Pro 9H coatings for interiors – like textiles (carpets and cloth) and leather.
A professional ceramic coating is going to provide a thin, yet durable and long-lasting shield on top of the headlight covers and also tail lights. It’s 100% transparent and does not impact the visual enhancements of LED lighting or other headlight bulbs.
If you’re thinking about having your headlights professionally restored, and protected with a high-quality 9H nano coating, click the button below to receive a free estimate.