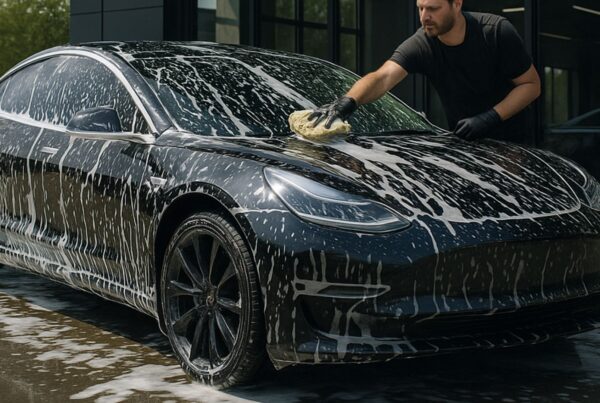
One of the most overlooked tasks of a complete detailing project is spending quality time inside. Daily driving includes getting in and out of your vehicle – and each time, dirt, dust, and debris finds its way into the carpets, seats, and those nooks and crannies. Interior car detailing starts by removing debris – even the smallest particles. This is completed when you vacuum the car interior.
There are several vacuums that can be used for car detailing – from the old cigarette-lighter powered car vacuum, reliable handheld vacuum dust-buster, to an industrial Shop Vac. The key to successful interior car detailing isn’t necessarily the vacuum you’re using – but the attachments and process used to remove those hard to remove contaminants.
As we continue with our Car Detailing 101 video and blog series, Adam Cote moves from outside the vehicle – to the interior – using a car vacuum cleaner with good suction power to remove pet hair and contaminants from the cup holder to those hard to reach tight spaces. Take a few minutes to watch the video, then follow the steps below for additional information.
Step One – Collect Your Supplies
We’re going to assume that you’ve watched all our previous videos and read the blogs in our Detailing 101 series. If you haven’t, here is a link to review them all.
Hopefully, you’ve reviewed them – because the information we’re going to provide builds off some of context in those exterior videos.
In our first overview of the entire detailing project, we completed all exterior tasks before starting on the inside. The reason for this is to reduce the potential of cross contamination with the supplies we use – such as microfiber cloths, brushes, or buckets for liquid cleaners – when you’re cleaning those sticky cup holders.
Anytime you detail your vehicle, it’s a good idea to use different colored microfiber cloths or towels. This will help you separate those used for outside cleaning or treatment vs those used indoors. For simplicity, consider using four different colors of microfiber towels:
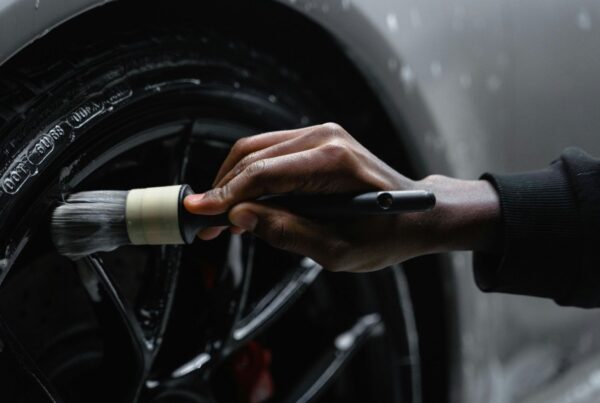
- Black – should be used on tires and wheels
- Red or Pink – should be used on exterior surfaces (paint and plastics)
- Green or Blue – used on glass surfaces
- White or Yellow – great for interior cleaning or dressings
You’ll also want to choose your vacuum cleaner. For optimal interior detailing, we recommend a high-powered shop vac – that allows quick connect attachments.
*PRO TIP: If you’re going to use a shop vac, make sure to be aware as to where you carry the hose. We recommend carrying it on your shoulder, which will help keep it away from exterior doors as you use it. If you don’t the hose can scratch that freshly detailed paintjob.
Step Two – Using Compressed Air to Blow Debris
Before you use the car vacuum, it’s a good idea to blow out excess dirt, dust, debris, and gunk from those tiny crevices, vents, and seams. We like to use a long, skinny, and direct air focused nozzle, that is attached to a high-pressure airline and compressor.
When using the air nozzle, there are two ways to accomplish optimal results:
For Two-Door Coupes & Trucks: Start with the rear seats. Work from top to bottom, from back to front, and the outsides of the rear seat to the center. You should blow all loose dirt and debris forward, out the front door if possible. Use a long, skinny, and direct air focused nozzle. When you’re done with the back, finish by working from front to back, top to bottom, and center to the outside of the front doors.
For Four Door Sedans and Trucks: When you’ve got four doors – use them to your advantage. In this case, it doesn’t matter whether you start from the back or the front of the vehicle. Just make sure to work from top to bottom and from center to the outside of each door.
Step 3 – Choosing the Right Vacuum Attachments
A professional detailer realizes that the objective of a complete interior detailing project is to completely remove debris that is trapped in those thick carpets, nooks, and crannies. To accomplish this lofty task, you might need to use multiple vacuum attachments. There are three that we recommend for most interior surfaces.
Carpet Tool or Soft Bristle Attachment: This is your go-to vacuum attachment for interior surfaces. It has flexible, soft bristles that allow you to work safely on multiple surfaces – carpets, leather and hard plastics, metals, or wood materials. The advantage is that you can really work the attachment on surfaces to help loosen debris on your car’s interior surfaces. The drawback is that it doesn’t provide optimal suction – which means it mainly lifts surface debris.
Crevice Tool (Digger): The next level of deep cleaning is the crevice tool called a digger. This has a flat edge, is a hard attachment, and is used to dig deep into textiles or carpets. It provides maximum suction, and picks up sand, dirt, and other small particles that are embedded in surface materials.
Edge Crevice Tool: The final crevice tool is known as an edge tool. This one is the long and skinny attachments that allows you to get to those hard to reach areas – like between seats and such. Like the digger – it provides optimal suction.
*PRO TIP: Before using the edge crevice tool, consider using that air nozzle attachment to blow debris from seat bolts, seat belt fasteners, and other small areas. You might want to keep a dusting brush with you as well – to help remove debris from the car’s interior.
Tips on Vacuuming the Interior
The actual process of vacuuming during car detailing is rather self-explanatory. You’ll want to use the soft bristle attachment on most sections of your vehicle. Those hard attachments should be used on carpets and hard to reach areas. It’s a good idea to be careful using those attachments on leather materials – as they can scratch them.
Here are some other tips:
- Work from the center of the vehicle to the outside. Again, the goal is to remove debris and have most of it vanish into the vacuum cleaner.
- Make sure to clean the shop vacuum filter and container prior to use. Remember, a vacuum works by sucking air into the nozzle, and out of the vacuum’s exhaust. A dirty filter or filled container will simply spread dirt and debris into the air – and potentially back into the vehicle (or right on the outside of your freshly detailed exterior).
- Consider replacing the indoor cabin filter. It’s likely that a full detailing job like this series explains is done every three to six months. As such, consider replacing the indoor cabin filter – which will improve your air quality and reduce the spread of virus or allergens.
In our next article in the Car Detailing 101 series, we’ll dive into cleaning the interior of your vehicle. One of the best ways to keep the doors, dash, center console, seats, and carpets cleaner is to have a professional-grade nano ceramic coating applied to the interior.
Ceramic Pro 9H interior coatings are custom formulated for specific substrates. Our Carpet and Textile coating helps provide a water-resistant surface on plastics and carpets – helping to make clean-up of accidental spills simple. We also offer a leather ceramic coating, which likewise protect your high-end interior surfaces.
If you’d like to request a free estimate for having the interior of your vehicle protected by Ceramic Pro 9H coatings or decontaminated with Ceramic Pro TAG – click the button below.