Pop quiz – what does the Loch Ness monster and using toothpaste to remove car scratches have in common? Answer – they are both urban legends, but one of them has some credibility to stand on – the monster (who indeed needs about tree-fiddy). Taking the DIY path for fixing minor damage or problems with your ride is more than acceptable. As a car nut, I take a lot of pride in getting my hands dirty when needed.
But – using toothpaste to fix scratches on a car is some shady stuff. In fact, the myth that you can fix scratches on your car using toothpaste is one DIY solution that does not actually fix things. It’s horrible advice – almost as bad as recommending that someone fixes their flat tire with duct tape.
Anyone can be a rabble rouser and point fingers to say something is wrong. So, rather than just telling you why it’s a bad idea, we are going to explain why toothpaste isn’t a good option for filling in scratches on your car’s surface and offer some alternative recommendations for what can be used to get the job done.
The Toothpaste Fixing Car Scratches Legend
The idea of using toothpaste to remove scratches from your car makes sense, from a certain point of view. Toothpaste is used to remove debris from your teeth. This is accomplished through the abrasive polishing agents that are found in toothpaste formulas. However, these abrasives are night and day from those used in automotive polishes or cutting compounds.

The majority of abrasives within toothpaste are made from chalk or silica, such as calcium carbonate, dicalcium phosphate, sodium metaphosphate, calcium pyrophosphate, and zirconium silicate, which, when applied to wet microfiber cloths, act as light-grit sandpaper for removing scratches.
Toothpaste sands down any unevenness in the surface of your car’s clear coating and fills-in any tiny scratches or gaps. But, when it comes to hardness, enamel of teeth is rather soft. The polishing compound in toothpaste is effective on soft-surfaces, however, such as CDs or DVDs. The clear coats on cars are much harder, and thus the toothpaste is not as effective.
When people have used toothpaste to fix scratches – it’s typically on a plastic headlight or brake light cover or other plastic parts. Even on those surfaces, it’s not very effective.
Challenges of Removing Scratches from Cars
Ready for a truth-bomb? Not all automotive paint scratches are the same. Now, I know that probably blew your mind – but hear me out. Most scratches found on a car’s paint surface are not deep enough to penetrate the car paint itself. The scratch is in the clear coat of the paint. Even the depth of the clear coat scratch is not identical in every situation.
Before attempting to eliminate a scratch from your car, you got to figure out exactly what kind of scratch it is, how deep the scratch, and the type of material that the scratch exists. Most people assume all scratches are the same which is simply not true; different grades of scratches have different processes for removal.
How to Identify a Type of Car Scratch
Scratches are the result of hard material piercing softer material. The type of scratch is based directly on how deep the scratch is. If the scratch is thin, it can easily be buffed out with cutting compound or polish. Deeper scratches, on the other hand, require sandpaper or other more aggressive techniques.
Here are the top four types of scratches found on the paint layer or surface of cars:
First – The Clear Coat Scratch
The first type of scratch found on vehicles is known as a clear coat scratch, or a swirl mark. These scratches are common and are caused by many different sources, such as dust, using dirty towels or mitts to dry the car, and automatic car washes. Since these scratches are microscopic, they are hard to see, but are visible when looked at a certain angle.
How to Remove the Clear Coat Scratch
Scratch removal or getting rid of swirl marks involves using a cutting or polishing compound paired with an electric buffer. The goal is to cut into the clear coat until it is level with the scratch itself, and then fill it with clear coat residual or polish.
Scratches that are deeper in your car’s clear coating, however, require more aggressive paint correction methods, such as sandpaper. Then again – the grade or grit-level of sandpaper is also unique to the type of scratch and the material – meaning, one size does not fit all.
Second – Embedded Paint Scratches
The next type of paint scratch is one in which the clear coat gets penetrated completely. You can tell that this is the type of scratch you are working with if you see some color or pigment in the scratch, which means it is cutting into your car’s bare paint. These scratches are not easy to remove. In most cases, the detailer will fill the scratch with a polishing compound, then seal the filled scratch with a car wax, paint sealant or ceramic coating.
How to Repair Embedded Paint Scratches
If the scratch is cutting into your car’s bare paint, there is no way to completely fix it unless you remove the entire clear coat of that section of your car. The alternative is to simply cover the scratch – so it is no longer visible. This can be done with a strong cutting compound and using an orbital polisher to polish.
Alternatively, you can sand the area to level everything out. This is risky, however, as you might easily sand into the primer. Even if you do this – you’ll likely have to repaint or, at the least, reapply the clear.
Third – Primer Scratches
If your scratch goes into the primer of your car, then there isn’t a simple DIY fix available. At this point, you would want to tape off the section of your car with the scratch, sand it all the way down to the primer so everything is level, and then apply several layers of paint matching the rest of your car and apply a clear coat on top of that.
Fourth – Bare Metal Scratches
A scratch that pierces all the way to the bare metal of your car requires attention. While you can try to take the easy way out and apply a clear coat to it to prevent exposure to external elements from making it worse, this will lead to moisture from contaminants under the scratch getting trapped and oxidizing, leading to rust formation.
Why Scratches Be Fixed ASAP?
Scratches must be fixed as soon as possible since even if it is only at the layer of the clear coating, exposure of the materials underneath to the elements will lead to oxidation and thus rusting.
Here are the two ways to go about dealing with car scratches:
Preserve and Cover Up the Scratch
Once you have identified a scratch on your vehicle, one approach is to preserve it and simply prevent any potential future damage, such as oxidation and rusting.
To do this, one method of car paint repair people follow is filling the scratch with a clear coat spray. The issue with this, however, is that overspray can cause contaminants such as debris and dirt to damage other areas of the car’s surface.
Another method that can be used to preserve a scratch is to apply a paint sealant or wax to the scratch. This fills the scratch in with a hard-protective layer that is easy to remove, unlike semi-permanent coatings such as ceramic coating.
Repairing a Scratch Through Paint Correction
The second approach to dealing with a scratch in your car’s paint is correction, which involves following a specific set of steps to remove the scratch from your vehicle’s surface. This process involves using a high-speed buffing and orbital polisher to cut directly into and level out the impacted area.
This corrective process can be done on scratches that don’t piece the car’s clear coating. You begin by evening out the surface by applying polishes and cutting compounds, fill in slight indents or imperfections, and then the scratch is no longer visible.
The Truth About DIY Paint Correction
So – if toothpaste isn’t the solution to fixing scratches, then what is? The answer is paint correction. Many automotive detailers claim that paint correction should only be done by trained professionals, and this is true if you are looking for optimal results.
However, you could still perform paint correction yourself, which we will go over below.
Step by Step Process for DIY Paint Correction
Here are the steps to follow for removing small swirl marks or minor scratches from your car’s paint. Scratches that are deeper or more serious paint damage should only be handled by a professional auto body detailer.
Prep Work
Before getting started on removing scratches, the vehicle must be prepped first. You’ll want to make sure all polish and wax is removed from the surface first, by doing the following:
If you’re going to use paint correction to remove swirl marks, it will have to be done on the entire vehicle, so always start by washing your entire vehicle using the two-bucket method.
Use a clay bar or clay mitt to wipe off any polish or wax and microscopic imperfections from the surface of your vehicle. You can also use iron remover spray to make it easier to wipe.
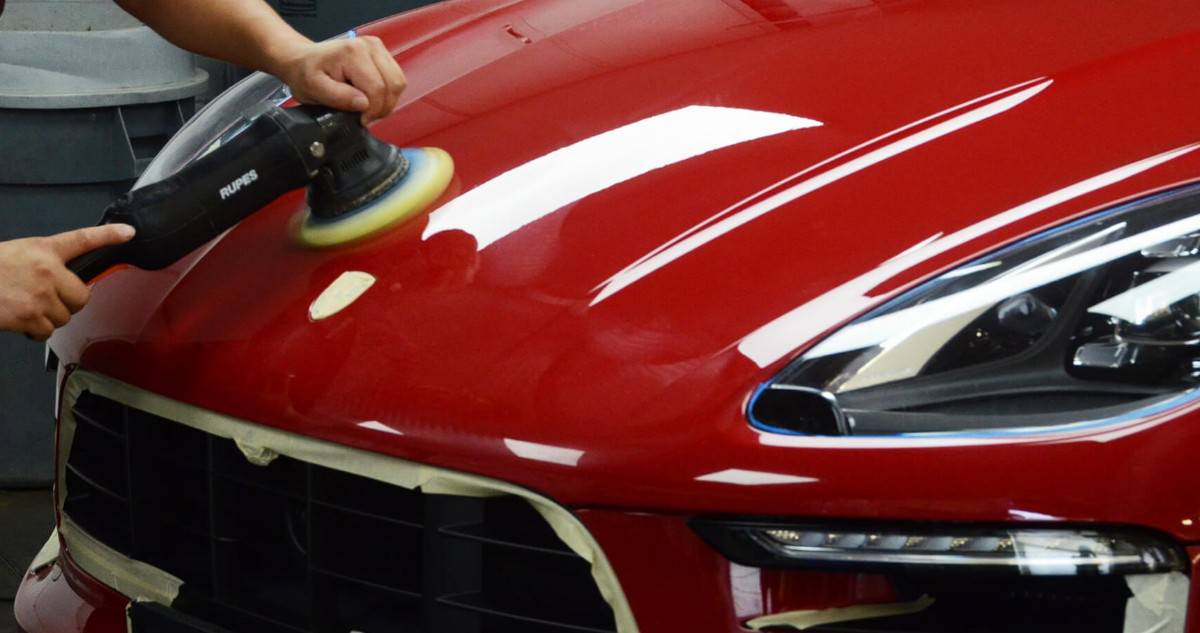
Leveling
Once your vehicle is prepped, it’s time to get the surface leveled. For this, you will need an orbital polisher, cutting compounds, and several clean microfiber cloth pads. Watch the video to learn how to do this step properly.
Polishing
After leveling the surface, it’s time to apply polish. For this, you will need polishing or buffing wheels and many clean microfiber cloths.
Here’s the best method to follow for polishing:
- Make sure to use a brand-new polishing pad and disk so that excess residue from previous cutting compounds won’t spread.
- Apply the polish in a pattern that follows the natural body lines of your vehicle.
- Change the pads often and use a new pad with each new coat of polish. About 2 to 3 polish coats should be enough to apply to the clear coat.
Protecting
After investing this much time, money, and energy into paint correction, you’ll definitely want to protect against any potential future scratches. Here are a few options to consider for this:
Paint Sealant or Car Wax
Quality car wax will do a good job of protecting your vehicle’s surface from getting more scratches in the future. Car wax only lasts about two months, so it will need to be removed and reapplied frequently. Alternatively, you can use paint sealant, which can last up to a year.
Nano Ceramic Coating
If you’re looking to significantly reduce the potential of future scratches, you’ll need a hard surface protectant. This comes in the way of a nano ceramic coating, such as Ceramic Pro 9H. The formulation uses nanotechnology to penetrate those minor paint imperfections or peaks and valleys in the clear coating.
When the coating hardens, it leaves a 9H hardness layer of flexible glass that can block UV rays, chemicals from natural toxins like bird droppings, bug splatters, and acid rain, and even reduce the potential of spray paint sticking – or an anti-graffiti effect.
This coating is always applied by professional detailers and comes with a warranty based on the level of protection you need. If you’d like to learn more about Ceramic Pro 9H coatings and receive a free estimate, please click the link below.