As we continue the Car Detailing 101 series, it’s time to focus on interior detailing. In earlier episodes, we discussed the proper techniques for vacuuming the carpets, seats, and other interior sections. While a solid, deep vacuum will remove a large portion of dirt and debris – it doesn’t completely remove stubborn stains, excessive pet hair, odors, or upholstery issues. Therefore, detailing the car’s interior with quality materials and techniques is important.
If you’re going to opt to an interior detailing service, this article will help you understand their interior detail process. If you’re going to take on auto detailing yourself, you’ll have to invest in some good products, use some important techniques, and follow a process that reduces the potential of bringing dirt back into the vehicle. So – let’s dive right into the deep cleaning and disinfecting your vehicle’s interior.
But first – take a few minutes and watch this video by Adam Cote to learn how the team at 5-Point Auto Spa completes a full interior detailing project.
Step 1 – Let’s Collect the Supplies
It’s often assumed that professional detailers use a special cleaning agent for every, single substrate or material. But you’d be surprised to learn that this isn’t always the case. In fact, the best detailers understand the importance of using a solid, all-purpose cleaning agent for the beginning steps of the interior detailing process.
The best expert detailers will use a high-quality pH neutral interior cleaning product – that is safe to use on multiple surfaces. Our product of choice is Americana Global Chaos All-Purpose Cleaner. Being that it’s pH neutral, it does not contain acidic or base ingredients that can instantly stain materials.
Along with a good all-purpose interior cleaner, you’ll need to collect the following to do a professional interior detail job.
*PRO TIP: If you’ve got pure leather seats or interior components, it’s best to use a dedicated and recommended leather cleaner for those surface areas vs the all-purpose cleaner.
Multiple Microfiber Towels: Don’t worry about buying the highest quality towels – just make sure to gather multiple microfiber towels. You’ll go through several of them during a full detailing project, so make sure you’ve got at least a dozen ready to go. Some elbow grease will be needed for excessive stain removal – so always keep an inventory of microfiber towels on standby.
Industrial Steamer and Attachments: Cleaning is completed through using all-purpose cleaners. Disinfecting and removing the chemical agents from those cleaners is done through hot steam. A professional detailer will use an industrial steamer to disinfect the interior. While most of the larger steam cleaners can be a rather large investment, you can use smaller ones with similar results.
Air Compressor & Attachments: When you’re detailing a car interior, it’s important to use tools that can help you remove stubborn debris like pet hair, that is in tiny cracks or seals of parts (like cup holders, carpet, floor mats, center console, door moldings, and vents.
A tool we use at many Ceramic Pro Auto Spa centers is similar with the Tornador car cleaning air gun. It has a vibrating cone attachment that concentrates air flow to smaller areas. This helps ‘shake’ the debris loose, so you can remove it.
Step 2 – Follow the Process
Once all the supplies have been collected and organized for easy access, you’ll be ready to start the detailing process. And that’s exactly what it is – a dedicated and consistent process. The key to detailing is to work in a pattern or structured order that helps to remove that stubborn dirt, dust, and debris quickly while reducing the potential of bringing more ‘stuff’ into the vehicle.
Here is how the Ceramic Pro team accomplishes interior car detailing:
- Keep your feet out of the vehicle: Regardless of how clean your shop or garage might be, dirt and debris will still collect on your feet (especially if you’re wearing shoes). For optimal cleaning, keep your feet out of the vehicle.
- Work both sides of the vehicle: Although it is a bit more time consuming, it is crucial to work with one side of the vehicle at a time. We like to work in a counterclockwise pattern, starting with the driver front, moving to driver rear seats (if you have a sedan or four door), then passenger rear, and finish with passenger front.
- Top to Bottom – Inside to Outside: When you’re detailing the interior, always start with the center of the vehicle. You should also detail from top to bottom, and work from the inside (or center) to the outside. Doors should always be the last thing you detail.
- Follow Your Pattern: Detailing involves three simple steps – cleaning (using the pH neutral all-purpose spray), disinfecting (using the steam), and final wipe down. Treatment (or using products to protect the surface is the final step in the interior detailing process – but should be done after these steps.
*PRO TIP: When working each entry point of your vehicle, finish one task at a time. This means, clean everything in the vehicle with the all-purpose cleaner, then start again with the steam decontamination and wipe down. This will help reduce cross contamination. Also – use fresh microfiber cloths for each step of the detailing process (so one for the cleaner, one for the steaming).
Step 3 – Clean All Surfaces
We spoke about using a good pH neutral all-purpose interior cleaner earlier – and here is when you’ll use it. When you’re detailing the inside of your ride, use this cleaner as described in the video above.
- Spray the cleaner liberally. Be careful not to spray too much or directly onto electrical parts (like infotainment display screens).
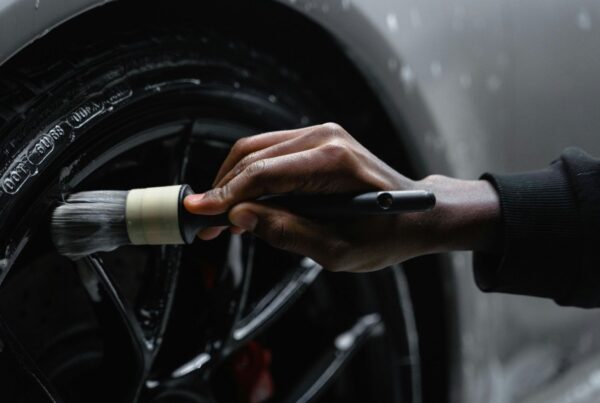
- Use a fine-bristle brush to gently scrub onto harder surfaces (such as dashboard, center console, and door panels) to help remove the debris.
- Use the whirl air compressor attachment to loosen up debris in tight fitting areas.
- Remove those inserts in center console, cup holders, and other areas to clean below them.
- Clean the vents – spray a little chemical cleaner in combination with the air compressor attachment.
- Wipe down each area with clean microfiber towels.
Step 4 – Disinfect the Interior with Hot Steam
After everything inside the vehicle has been cleaned – it’s time to proceed with the hot steam treatment. The key here is to use the steam to remove the cleaner residue – as it can be sticky to surfaces once dried. The heat of the steam will also kill many microbes and bacteria inside the vehicle.
Here are a few tips for steaming – as always, the video is a great resource for learning how to do this by watching Adam go through the process.
- Don’t oversaturate the surface
- Use fresh microfiber towels to avoid cross contamination
- Use the steamer more aggressively on hard surfaces (such as door panels)
Step 5 – Clean Leather Materials
Your last step in the interior detailing (cleaning and disinfecting part) is taking care of your leather materials. It’s always a good idea to consult with experienced detailers on which products they recommend for the specific leather in your ride. The process is similar with cleaning other materials inside your car’s interior:
- Spray on leather cleaner
- Use the brush to loosen debris
- Scrub gently – let the fibers of the brush do the work.
- Steam clean to loosen up debris and disinfect
- Wipe clean with fresh microfiber towel.
Protect Your Interior with Ceramic Pro 9H Coatings
Detailing your vehicle is streamlined and expedited when the surfaces are protected. This is the power of a professional grade nano ceramic coating – like Ceramic Pro 9H. Our coatings are formulated for specific materials – such as textiles, carpets, vinyl, and leather.
Once your vehicle’s interior is completely clean and dry, having one of our professional auto spas apply Ceramic Pro interior protection will help reduce staining, potential of debris sticking to the surface, and resistant to liquids.
If you’d like to explore opportunities with Ceramic Pro 9H coatings for the interior of your vehicle, click the button below to request a free estimate.